- Have any questions?
- +8801332391216
- hello@clippingpathassist.com
Adobe photoshop toolbar definition

How to make a background transparent in Photoshop
April 10, 2022
Clipping Path Service for Photographers – What Are the Benefits?
September 4, 2022Table of Contents
Adobe photoshop toolbar definition
Adobe Photoshop CC 2020 is an amazing software for editing any image. Are you searching for such an amazing tool? Then this tutorial (Adobe photoshop toolbar definition | Photoshop CC 2020 Introduction)
can help you introduce yourself step by step. Is it all tools?
If you started with adobe photoshop cc 2020, you need to research photoshop tutorials as it helps you learn the program.
If you asked someone
what is magic wand tools?
What are the best photoshop helpful tools?
How do you customize the photoshop toolbar?
Then read carefully this article a to z.
Photoshop cc 2020 offers you many facilities and delivers you a well-printed photo.
Let’s look at how to customize the photoshop toolbar in photoshop cc 2020-and how to use them with examples.
In this article, I will discuss with you
- Where is photoshop cc toolbar
- Photoshop cc toolbar
- Adobe photoshop cc 20 tools definition
- Move tool
- Rectangular marquee tool
- Lasso tool, polygonal lasso tool, and magnetic lasso tool
- Magic wand tool
- Quick selection tool
- Fill tools
- Crop tools
- Object selection tools
- Eyedropper tool
- Erase tools
- Brush tools
- Magic eraser tool
- Clone stamp tool
- Healing brush tool
- Dodge tools and burn tools
- Hand tool
- Zoom tool
Where is photoshop CC 2020 Toolbar?
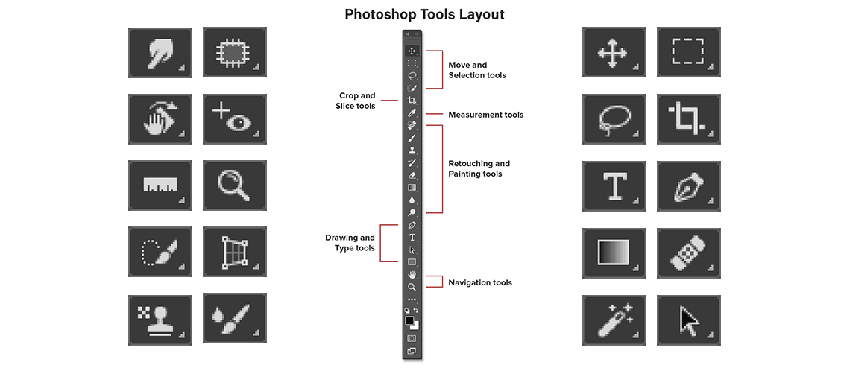
Photoshop toolbar is a part of photoshop that is anchored to the left of the application windows. Photo editors can move it around and change the size depending on their needs.
How to customize the Toolbar in photoshop?
One can customize the toolbar part of photoshop in some different ways.
Move the Toolbar: To customize the photoshop toolbar or location, click on the dotted line located at the top of the Toolbar. You need to drag the Toolbar to another part of the screen. This function un-anchors the Toolbar from the default location.
Use columns: If you prefer the adobe photoshop CC 2020 toolbar, you can choose single or double columns. Click on the triangles again from the Toolbar back into a single column.
Add/remove tools: if you use Photoshop CC 2020, you can customize your photoshop own. However, Photoshop CC 2020 allows you to remove or add any tools from its panel. Click on the three dots located at the bottom of the Toolbar and above the foreground color. Add or remove tools from this panel.
Once you delete an important tool unconsciously from photoshop CC 2020 toolbar, it will show from the dropdown menu. Click on these dots. If there is a default setting, the only option is to click on the edit toolbar. Click on edit and open the customize Toolbar.
Within this panel, you can customize the tools that appear on the Toolbar. The tools you rarely need can move into the extra tools so they won’t show in the Toolbar. Click on the tools you want to move or add from the Toolbar, or drag it to the extra tools column. You can also drag tools from extra tools to the toolbar column.
Foreground and Background Color in Toolbar
On the Toolbar, you will see a similar dot to the below photo. Here you can see two color squares. Note that one square rests on the top of the foreground color. If you click on this arrow to the top of the right of the square, the color of this panel changes automatic pr switch from another.
The color that stands in the foreground we mentioned earlier is the background color, and the color is named background color. You can change these colors by double-clicking on the color square and adjusting it with your color. Using color picker tool, you can change the color of the window.
It’s important to understand what foreground and background colors are regular on this and which tools work for in this section.
For instance, you can change the background color using the brush tool; you will paint with the foreground color by default. You can change the background color any time using an eraser tool or moving the part, creating a selection. The background color will show through into your image.
Adobe Photoshop CC 2020 toolbar Definition
There are so many tools in adobe photoshop CC 2020 that you can use in post-processing. These tools are used for e-commerce product photo editing. Here I will discuss different tools in Photoshop CC 2020:
- Move Tool
- Rectangular Marquee Tool and Elliptical Marquee Tool
- Lasso tool, Polygonal Lasso Tool, and Magnetic Lasso Tool
- Magic Wand Tool
- Quick Selection Tool
- Crop Tool
- Object Selection Tool
- Eyedropper Tool
- Brush Tool and Eraser Tool
- Magic Eraser Tool
- Clone Stamp Tool
- Healing Brush Tool
- Dodge Tool and Burn Tool
- Hand Tool
- Zoom Tool
1. Move Tool
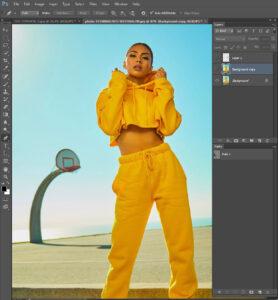
The move tool is the first tool easily visible in the default toolbar. You can access this tool from the keyboard “V” The move tool is used when something needs to move or inside the image. If your image has one layer and this is locked, then the move tool isn’t working. Remind that you must have a minimum two-layer for moving layers up and down.
You can also use this tool in a single layer with no lock.
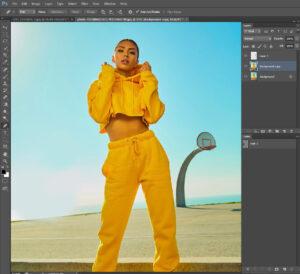
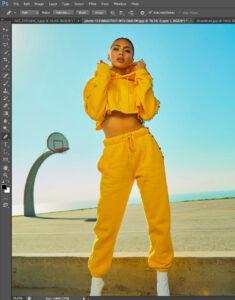
In the image below, the stand to the left of the model is in its layer
Select the move tool and drag the stand anywhere in the images.
2. Marquee Tool and Elliptical Marquee Tool
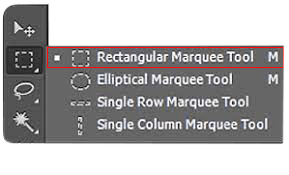
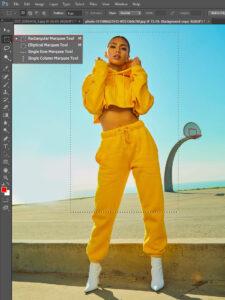
This tool allows you to select the area in the image. By default, the rectangular marquee tool shows beside the move tool.
To access this tool, click and hold and select the area you need to replace or delete. You can access this tool in a shortcut process by typing “M.”
The rectangular Marquee Tool
The Elliptical Marquee Tool
It allows you to make image round selection
The single raw marquee tool
The single raw marquee tool makes a 1px horizontal selection that spans the total width of your image. This tool can use to create a 1px repeating pattern for your website content.
The single-column Marquee Tool
The Single column marquee tool makes a 1px vertical selection that spans the total height of your image. This tool can use to create a 1px repeating pattern for your website content.
3. Lasso Tools
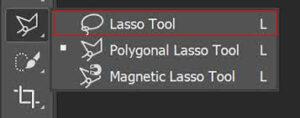
There are several lasso tools in photoshop that allow you to make a selection. The lasso tool helps you select around images and adjust layers like a lasso—these tools as like marquee tools.
Polygonal lasso tool
The polygonal lasso tool allows you to make a selection of your image; this is linear. This way, you can draw a straight line for your selection.
Magnetic lasso tool
The magnetic Lasso tool lets you drag your mouse over the edge of an image. It determines where your edge is, and anchor points are automatically placed at a regular interval. The magnetic tool gives you a very close and controlled selection.
4. Quick Selection Tool
These two tools allow you to make a quick selection in different ways. The quick selection tool makes a selection for an image on the edge of the object. As its name is a quick selection tool, it quickly selects your object and judges the area. Just drag or click the area you want to select.
Object Selection Tool
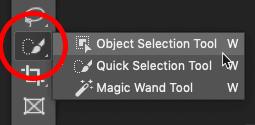
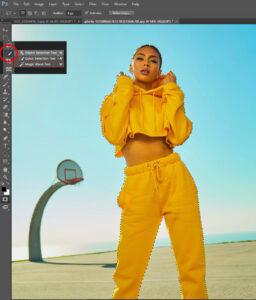
The object selection tool allows you to make a selection of an object within your photo background complexity. This tool accesses the object, click and hold on the magic wand tool and select the object tool from the dropdown menu. Once the tools are visible in the Toolbar, you can access this tool by typing “W”.
To access this tool, click and draw a selection around the object you want to select. Photoshop will help you select the edge and attempt to refine your selection by including the object from the background part.
Once you have finished the selection with the help of the object selection tool, you can select using a rectangular marquee shape or lasso tool shape. You can change this two-option bar at the top of the application window.
Magic Wand tool
The magic wand tool makes a selection based on your click. To select the image, you need to hold on shift to add to the selection and hold alt to take away from your selection.
5. Crop Tool
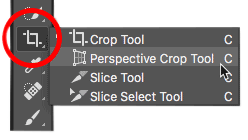
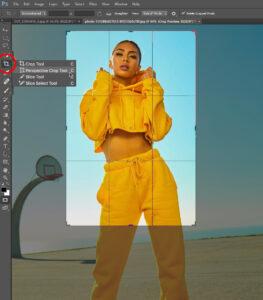
This tool allows you to crop an image to resize what you need. The crop tool inputs a set ratio of 4 X 6, or you can set your ratio to fix the size and fix the resolution for your cropped image. There are so many tools included in crop tools as
Perspective crop tool
Slice tool
Slice select tool
6. Eyedropper Tool
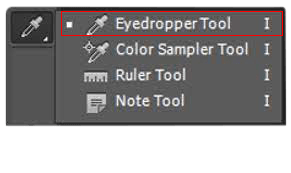
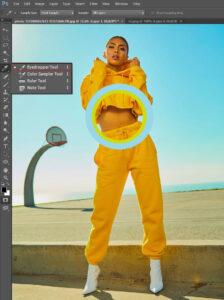
The eyedropper tool allows you to take a sample of color from any image to use it for your work. This tool takes a sample of a pixel. You can control the color area to give you a sample for your current layer.
3D Material eyedropper tool
Color sample tool
The color sample tool allows you to sample four areas of color within your image to get information about those colors. From the eyedropper tool, you can determine the range of pixels that it samples.
Ruler tool
Note tool
Count tool
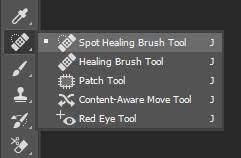
7. Spot Healing Brush Tool/ Healing Brush Tool? Patch Tool/ Content-Aware Move Tool/ Red Eye Tool
Spot Healing Brush Tool
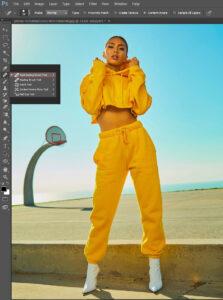
The spot healing brush tool is great for removing blemishes or acne from images. This tool works with a simple click of a mouse; it takes sample automatic surrounding areas and removes the blemish. These tools are usually used for Photo retouching Purposes.
Healing Brush Tool
The healing brush tool allows you to remove blemishes and areas that aren’t desired in your images. Unlike the spot healing tool, the brush requires selecting a reference point.
Patch Tool
A patch tool is a great tool that allows you to make a selection like a lasso tool. Once the selection is made, you can click and drag the area to fill it or release it. It patches that area with the selected content.
Content-Aware Move Tool
The Content-Aware Move Tool use to fill any moved content with what it perceives to be there. For example, if you want to fill an empty area. Then this tool may be helpful for you. Photoshop content-aware tool is the perfect tool to fill any content.
Red-eye tool
A red-eye tool is a quick tool that helps you remove any portion of an image or have any red-eye. This tool can remove any object instantly.
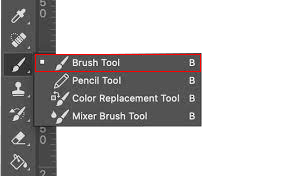
8. Brush Tool/Pencil Tool
Brush Tool
The brush tool is one of the important tools in the Photoshop toolbox. You can use this tool more than any other tool in photoshop; especially when you work in retouching, then this tool may be most powerful than any other tool. You can change the brush size and reduce hardness, shape, texture, opacity, flow, etc.
Pencil Tool
The pencil tool allows you to draw on an image like a marker. You can use this tool as a real pencil, hence the name.
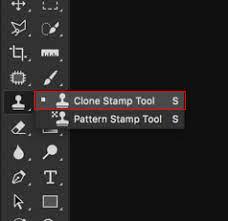
9. Clone Stamp Tool/ Pattern Stamp Tool
Clone Stamp Tool
The clone stamp tool is used to copy or clone something from an image and set another place of an image. You can hold the Alt key to pick a source from an image and then click the pimple/ dust area to replace this. You can use this tool to remove acne, dust, or garbage from the image.
Pattern Stamp Tool
This tool gives you the ability to use a brush-type tool to paint a pattern or texture on your image.
Color Replacement tool
Mixture Brush Tool
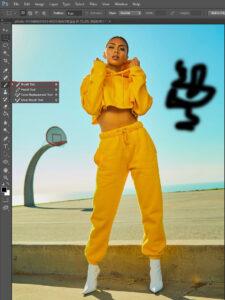
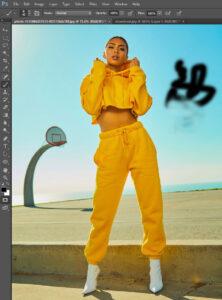
10. History Brush Tool
Suppose you have a mistake when you retouch an image. If you retouch a different layer besides the even layer, the history brush tool may help you this time. The history brush tool allows you to bring the details from the previous point and separate layers. This tool is like an undo feature.
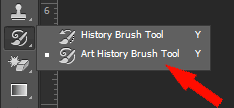
Art History Brush Tool
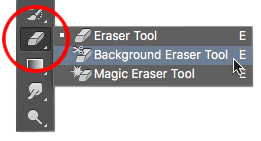
11. Eraser Tool
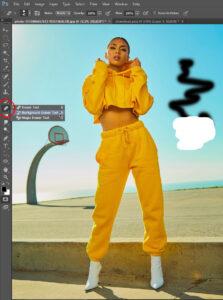
The eraser tool removes pixels from any image and makes it look like there have nothing—this tool work as a real eraser. You can use the brush tool and perform your own choice
If you reduce hardness, opacity, and flow, if needed, you can increase this tolerance, and flow. The increase and reduce are depended on image complexity.
Background Eraser Tool
The background eraser tool is awesome for removing the background from an image. This tool is called a one-click tool. Just click and drag the eraser along the edge of an image and remove the background from any image. Though sometimes it’s not perfect for removing background, it goes a long way toward the goal.
Magic Eraser Tool
The magic eraser tool removes the background or any part of an image with one click. It does a good job, but sometimes it removes more details from an image and some necessary parts from an image. So, you have to be conscious when using this tool to remove any image background.
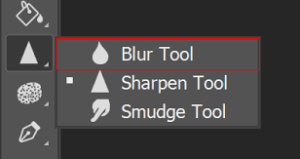
12. Blur Tool/ Smudge Tool/ Sharpen Tool
Blur Tool
The blur tool lets you blur a part of an image; the blur tool can help you to harsh contrast between images. It works like a brush tool and gives you accurate image results.
Sharpen Tool
The sharpen tool allows you to make the image sharpen and paint on them. This tool gives you a lot of control accuracy when you use it for sharpening any image.
Smudge Tool
This tool also works like a brush. This tool helps you be accurate in any image’s pixel when you push the brush around. It allows you to blend and transition colors easily.
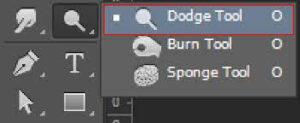
13. Dodge Tool/ Burn Tool / Sponge Tool
Dodge Tool
The dodge tool allows you to highlight your images in different tones and ranges. The dodge tool knows how to make the hair and dress are lighter and brighter in color
Burn Tool
The burn tool allows you to de-highlight your images’ different tones and color ranges.
Sponge Tool
This tool lets your art in a grey color.
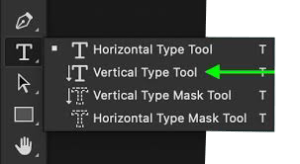
14. Text Tool
The text tools help you to create your type in photoshop.
Horizontal Type Tool
The horizontal type of tool lets your type horizontally like as normal text.
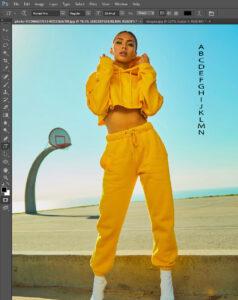
Vertical Type Tool
The vertical type tool lets your type vertically instead of horizontal methods. This tool allows you to write the vertical method.
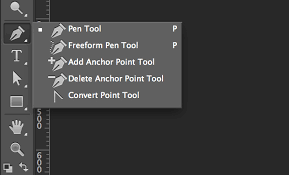
15. Pen Tool
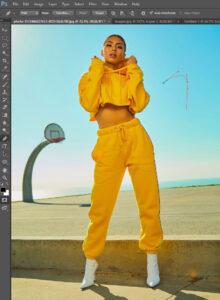
The pen tool is the most valuable in photoshop. With the help of the pen tool, you can draw a path for use in your image. Photographers use a pen tool in photoshop to draw a path around the object for their project.
Adobe Photoshop software allows you clipping path using the Photoshop pen tool to have no background around the images.
Freeform Pen Tool
This tool allows you to draw any shape and any path created automatically. The freeform pen tool also created anchor points automatically.
Curvature Pen Tool
The curvature pen tool allows users to create curved shapes with points. Users can create, edit, toggle, add, and remove any curves without requiring other tools.
Add Anchor Point Tool
This tool allows users to create, edit, and spin any corner or segment they need to enlarge.
Delete Anchor Point Tool
This tool allows users to delete any corner or any segment they need to remove
Convert Point Tool
This tool allows users to convert straight points to curve points and vice versa.
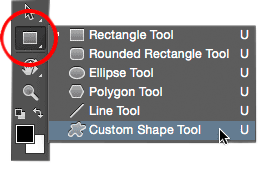
16. Shape Tools
Different shape tools allow you to create a different shape based on paths or vector shape layers, which gives you well-defined lines.
Rectangle Tool
This tool allows you to create a rectangle shape for your image.
Rounded Rectangle Tool
The rounded rectangle shape tool allows you to create a rounded rectangle shape.
Ellipse Tool
The ellipse tool allows you to create a round shape perfect for your image.
Polygon Tool
This tool allows you to create a polygon shape.
Line Tool
This tool allows you to create a straight-line shape with your image.
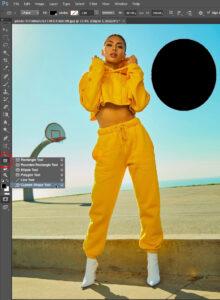
Custom Shape Tool
The custom shape tool allows you to draw a custom shape.
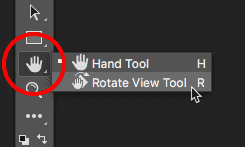
17. Hand Tool
The hand tool allows you to move any area of an image without suddenly dragging around a layer of an object on a layer. You can switch images from one place to another by using the hand tool holding the space bar.
Rotate View Tool
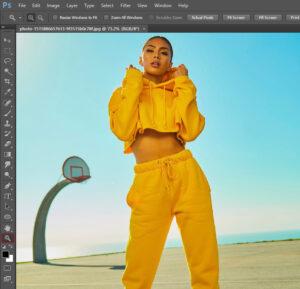
18. Zoom Tool
The zoom tool allows you to zoom in and out of your image. This tool is most commonly used when you want to zoom in on a specific part of an image. You simply click and drag a selection of an image, and photoshop will help you zoom in or out on that area.
Adobe Photoshop is the most commonly used tool. Take some time with your favorite image to explore these tools to bring a good result and happy practicing.
How to get the Toolbar back in Photoshop CC 2020
If you have not found your Toolbar from the left side window, you can discover the toolbox by clicking on the X at the top of the menu. If you accidentally make your Toolbar disappear, go to the window> tools to make the Toolbar visible again. You can also go to the window> Workspace > Reset to put all palettes, including the Toolbar, back into their default position. If your Toolbar and all of your plates disappear, you may have type TAB. Type TAB to make your Toolbar and palettes visible again.

